Epson printers have long been among the most popular printing machines in the world. It’s due of the high-quality printing and creative design. However, with so many Epson printer models to choose from, it can be difficult to make the best purchase selection. This blog will show you how to clean Epson printer heads in a few simple steps.
1. What is a printer head, and how important is it?
A printer head is an internal component of a computer printer. It allows the printer to write on the paper and spray ink on it. The electrical circuits and nozzles in a printer head are the essential components. Inkjet and dot matrix printers both have printer heads. It’s also crucial to know how to clean Epson printer heads. Inside the ink cartridge is where the printer head is placed.
In a dot matrix printer, on the other hand, the printer head is only a pin. The printing processor sends all of the printing instructions to the printer head. The strength, volume, and position of the required ink are next evaluated. The head moves horizontally and line by line.
2. Why are printer heads constantly clogged?
There are a variety of reasons why you aren’t obtaining as many pages as you anticipated. The most obvious idea is that the more pages you print, the more ink you’ll need. Clogged nozzles in the printer head could also be the cause. It’s a very typical issue that many individuals have, regardless of the printer’s brand. There are a plethora of reasons why this occurs. Understand this: in the case of printing, reducing the diameter of printer nozzles improves print quality. Epson printers become clogged as a result of their high print quality, necessitating the cleaning of Epson printer heads. You might find some temporary relief if you clean the printer head frequently enough. The ink that pushes out after you clean it, on the other hand, stores and dries. That is why you keep running into the same problem.
3. How can you avoid clogging your printer head?
Make sure the nozzles are clean.
The nozzles become blocked as a result of air obstructions. Because nozzles are getting smaller with each technological advancement, these are increasingly prevalent. One of the most common causes is dried ink. Then there is dust. Dust can cause a slew of issues, including clogging Epson printer heads. The dust is carried inside by the air, where it is mixed with the ink. In addition, filthy printers have more clogged nozzles. As a result, please clean your printers on a regular basis. Remember that cleaning the printer is a sensitive procedure and that you must be gentle with it. Use only the cleanest paper towels and towels. An air duster or a vacuum are the finest ways to clean the printer.
At night, turn off the printers.
If you have a printer at home, you will need to turn it off from time to time. The issue is that many printer owners never turn them off. And if you don’t switch off your printers, you’re effectively never turning them on. As a result, the mini-cycles are unable to run and protect the printer. As a result, turn off your printer at night because that is the only time you will not need it. It can also take a break.
Regular printing
If you don’t use your printer sufficiently, the nozzle becomes clogged. On the other hand, if you use it frequently, the ink will flow. This consistent flow also prevents negative air pressure from accumulating inside. It also keeps dust out and prevents the ink from drying. As a result, make regular use of your printers.
When cleaning, don’t use more than three printing cycles.
It’s a good idea to clean your printer. However, cleaning excessively can be detrimental. When a person has printer troubles, they begin cleaning them and learning how to clean Epson printer heads. That should never be the case. To build the ink and dry it up, don’t run more than three print cleaning cycles at once.
4. How can I get my printer heads to automatically clean themselves?
Follow these procedures if you want to clean the printer heads automatically rather than manually using the methods listed above.
Step 1: Ensure that the printer is turned on.
Step 2: Turn off the ink-out light.
Step 3: Next, make sure that the sheet feeder is loaded with A4 or any other paper size.
Step 4: Finally, open the Print or Page Setup dialog box.
Step 5: Next, select the Utility option.
Step 6: Next, select the Auto Nozzle Check and Cleaning option from the drop-down menu.
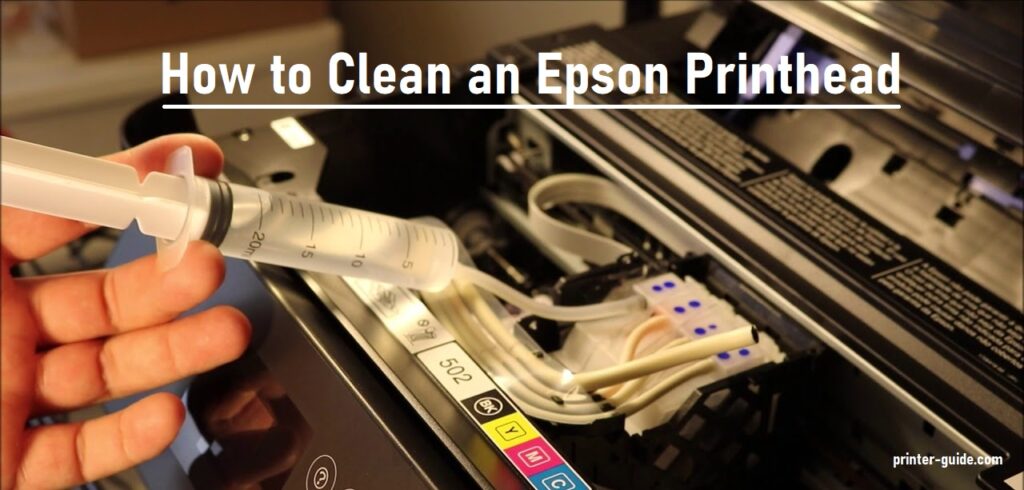
5. Instructions for manually unclogging Epson printer heads.
If you want your printer to perform well and produce decent results, you must keep it clean and learn how to manually clean Epson printer heads. It’s also critical to keep the printer head clean. To begin, you must learn when the printer requires cleaning.
6. How often should the printer be cleaned?
-When the printer prints nothing but blank pages
-If it’s been a long time since you’ve used the printer,
-The writing is unclear when the printouts arrive faded.
-The original color is missing.
-One of the nozzle colors is blocked
7. What is the procedure for doing a nozzle check?
Step 1: First, look for the maintenance screen.
Step 2: Pick the Nozzle for the Print Head. Heads-up:
Step 3: Check to see if the loading tray is full of paper.
Step 4: A CMYK color chart made up of lines will be printed by the printer.
Step 5: Clean your printer head if your printouts are unclear or faded.
8. Epson Printer Setup Instructions
This step-by-step guide will walk you through the process of setting up your Epson printer. If you follow these steps carefully, you should be able to install your Epson printer without too much difficulty.
Step 1: Make sure your printer is connected to the internet so you can use it from your computer.
Step 2: Turn on the printer and visit Epson’s official website. Download and install the Epson Printer Connect Utility for Windows.
Step 3: Read the contract and then click Next.
Step 4: Select Next after clicking Install and selecting the product from the menu.
Step 5: Click Next after selecting Printer Registration.
Step 6: After seeing “Register a Printer to Epson,” select “Agree” and click “Ok.”
Step 7: Create a new account or log in with an existing one.
Step 8: Select “Close” from the drop-down menu. The Epson printer will be set up.
9. What is the procedure for loading paper into an Epson printer?
Step 1: Close the paper stopper and output tray first.
Step 2: Pull the paper cassette out of the way and slide the edge guide outward.
Step 3: Then, with the printing side down, load envelopes.
Step 4: Now it’s time to slide the edge guides against the envelopes.
Step 5: Gently slide the paper cassette into place.
Step 6: For the Paper Size and Paper Type, choose Envelope respectively.
Step 7: Finally, click OK.
Step 8: Finally, make sure the output tray is extended. After that, remove the paper stopper.